Assembling the fin and tailplane
Saturday, 28th May, 2011
Completion of the wing root fairings has led naturally to the resurrection of the empennage group – tail plane, elevators, fin and rudder – which I embalmed in Bubble wrap several years previously.
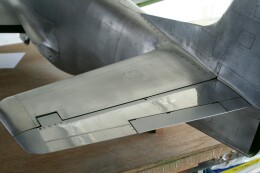
The final assembly of major components such as these are the high spots in a long-term project when the model can be seen to be taking shape. But as a prelude I needed to test-fit the fin and horizontal stabiliser, which required setting the model up on its worktable to a horizontal datum. The first thing I noticed was that the fin was slightly out of vertical, something I thought I had got right during the woodworking stages. The horizontal stabiliser also required a packing piece or two before bolting in place. My primary fixings are designed to be robust, but significant additional strength and rigidity would be imparted by the fairings.
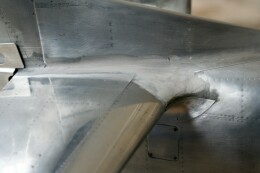
I started with the dorsal fillet, which was straightforward except for the piece that describes the tight radius between fillet and fin, which took some painstaking forming, cutting and fitting. (As an aside here, scrutiny of any P-51D will reveal that the fin fillet root is slightly offset to port in order to counter propeller torque.) The tail plane fairings were made similarly to those for the wings, except that I derived the shape using two-pack car body filler applied directly to the model and sculpted in-situ to the correct curvature. The trickiest part was the radius where the leading edge fairs with the fuselage side, which I achieved with the help of two little alloy webs ‘Super glued’ in place port and starboard and packed out with filler. The result was easily robust enough to withstand the metalworking that would follow. Again the procedure was essentially the same as for the wing root fairings and airframe skinning generally – to work away at the softened litho plate with various ball-ended wooden tools until it conforms to the underlying shape. The key is to repeatedly anneal and to leave sufficient surplus metal to trim off once the shape has been achieved.
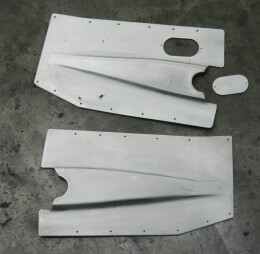
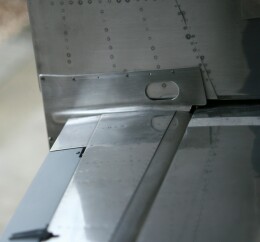
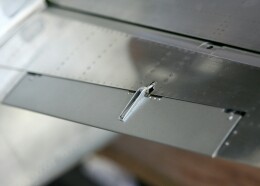
The tail plane fairings comprise five separate pieces per side, including the leading edge component, which conveniently has a weld seam. The only case for special treatment was the empennage fillet, which embodies the shape of the elevator root. I was able to achieve this by carving a tapered hardwood former permanently sandwiched between two thicknesses of metal. By squeezing the annealed top layer down over the wooden plug the finished shape emerges – a simple but effective technique.
Previous post

Grappling with gremlins
Next post

Rudder fabric

