Empennage: The final details
Monday, 29th October, 2018
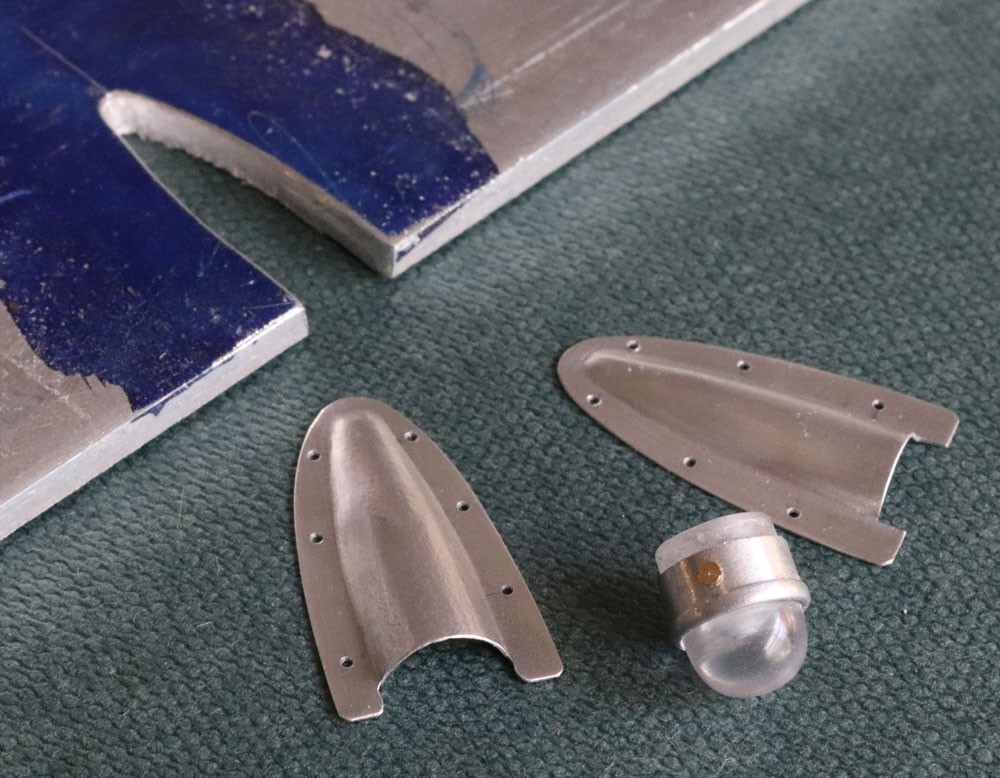
Before I could begin the landmark task of fabric covering the rudder and elevators of my model a few minor items remained to do in the shape of the tapered tail light covers together with the push rod fairings and their associated control horns needed for the elevator trimmer tabs. Whilst the tail light itself features in these pictures, this had been made many moons ago and retrieved from storage for the task at hand.
A simple V-shape – marked off from the drawing and cut in minutes from 1/8-in. aluminium plate – served as the former for my tail light fairing halves. This is gripped together with a scrap of gently annealed litho-plate in the bench vice, and the latter is literally forced into the gap using nothing more sophisticated than the variously rounded ends of a pair of small artist’s brushes. The technique is easy to master, such that after one or two practise goes a credible pair of well matched fairings results. All that’s required then is for the flanges and the open ends of the fairing to be cut and filed to shape and drilled for the fixing screws.
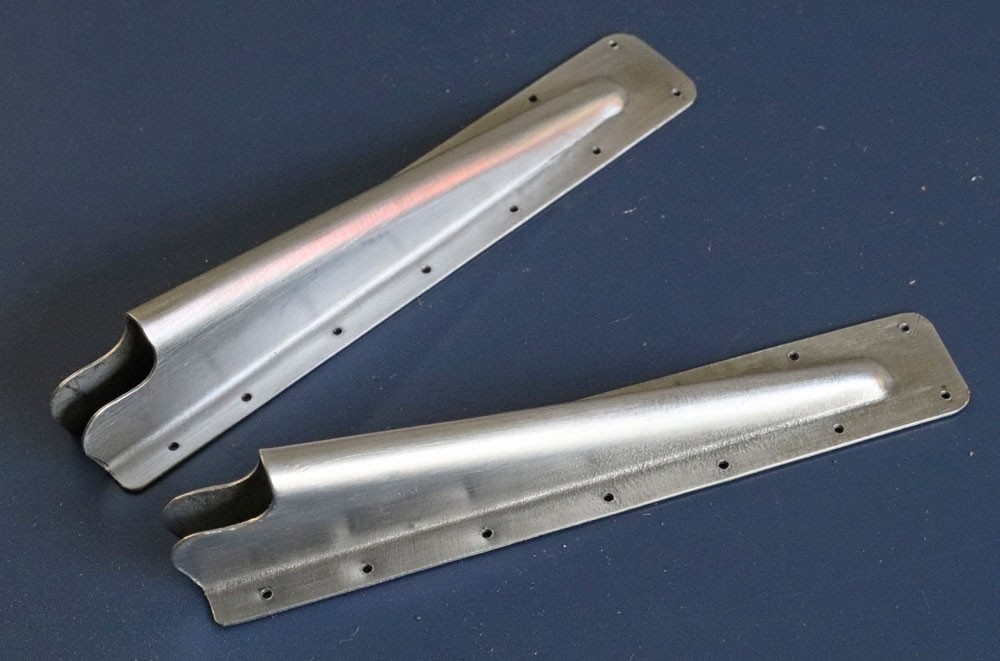
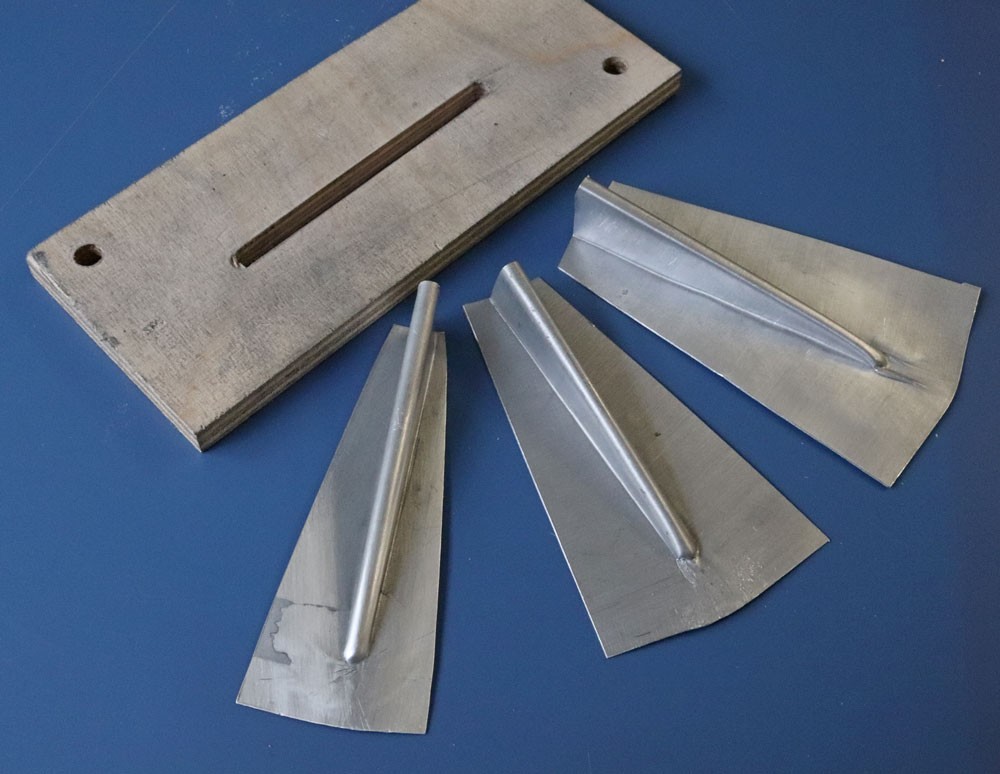
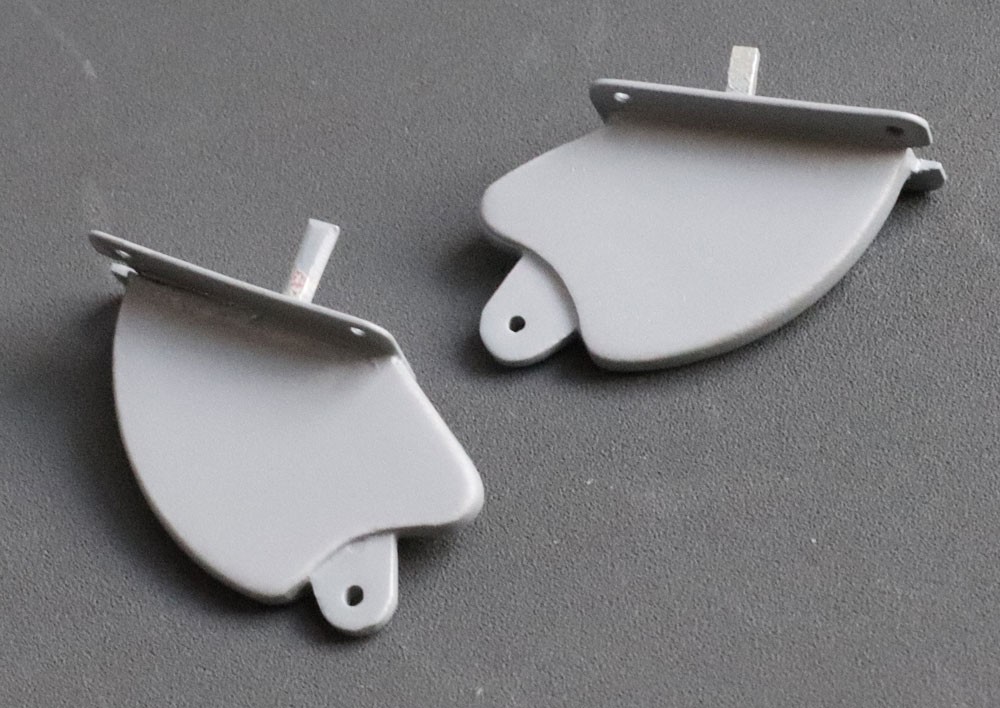
The elongate push rod fairings are made in much the same way, except that the tight U-shaped bend is formed first, before the piece is inserted into a slotted former cut from 1/4-in. plywood. The flanges are then bent apart all round and burnished back flush over the hardwood surface. Inevitably, small creases form around the blind end, but with patience these can be dressed out with a light-weight jeweller’s hammer. There is an element of hit and miss involved in the process, such that out of five attempts I achieved two usable pieces. As above, the flanges are marked and cut with a ruler and sharp blade and drilled. Finally, the cloven open end of the piece is marked and filed to shape with a good eye and delicate touch.
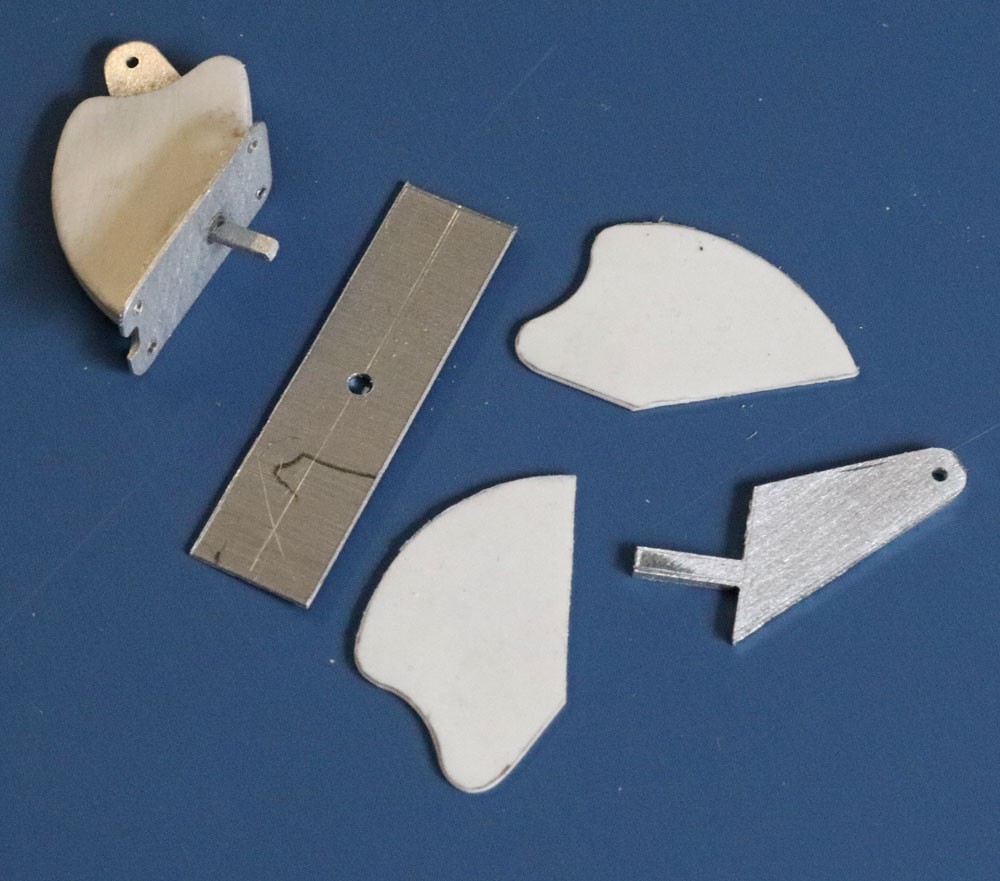
The tiny control horns are fiddly to do, and time consuming. I made them from scraps of aluminium and styrene sheet, and the process can be inferred from my pictures. The only parts not shown are the tiny styrene infills – the ‘meat in the sandwich’ immediately fore and aft of the aluminium control horn. These are secured by a minute application of liquid styrene cement before trimming to shape; whereas for the rest, this is the sort of job where CA glue proves worth its weight in gold.

