Sliding canopy – the vac-form tool
Wednesday, 7th August, 2019
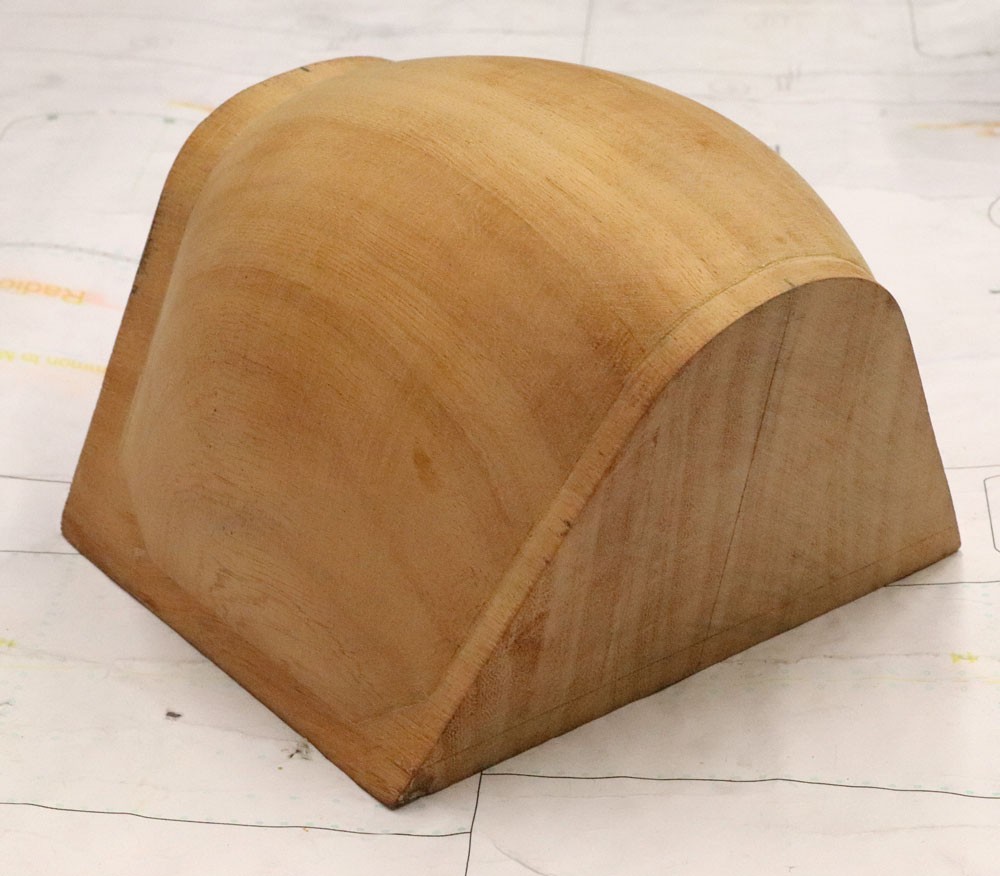
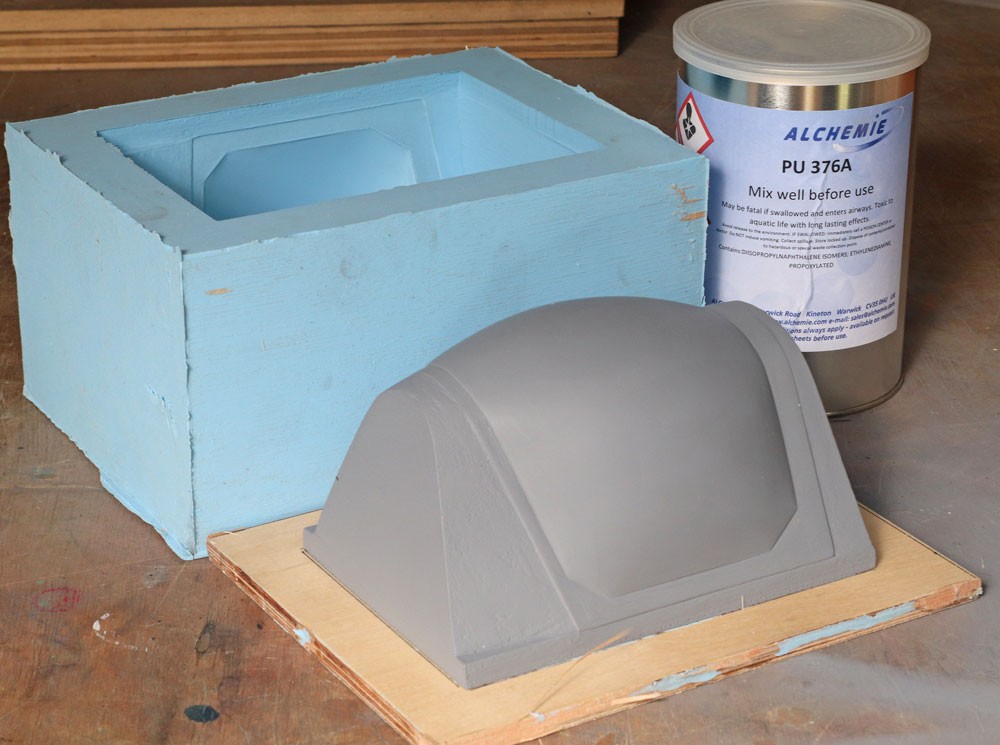
It is more than a year since I commissioned Colin Essex to carve the pattern for my Spitfire’s blown canopy. Colin is a true craftsman (see my July 2017 blog, ‘Some expert help’) whom I knew I could trust to interpret the profile and section drawings accurately. As my photos show, I asked him to include the full extent of the canopy frame, thereby allowing me to build up the metal structure over and around the edges of the vac formed piece.
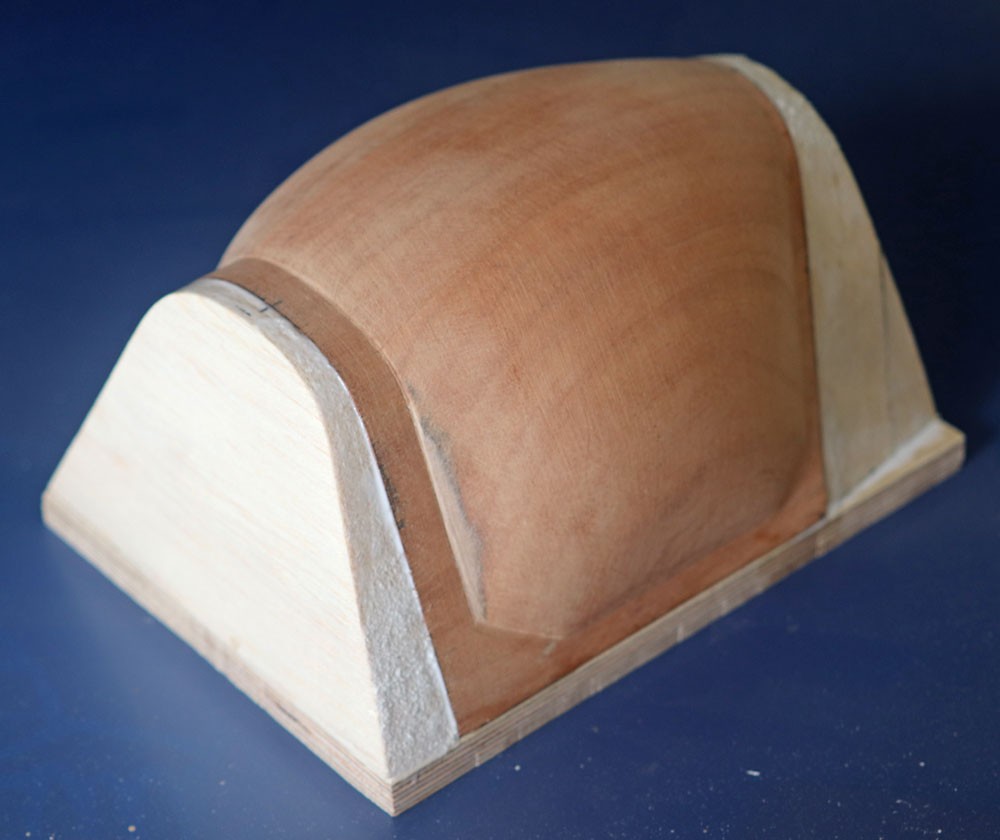
My first task was to apply multiple spray coats of automotive acrylic primer, to the wooden pattern, rubbing each one down until all traces of wood grain had been filled. Next I grafted on a pair of wedge-shaped balsa wood extensions fore and aft in order to provide the splayed profile needed to facilitate the release the vac formed piece from the tool. I also added a 1/4-in. plywood base plate that would help the plastic to snug-down over the underside of the frame.
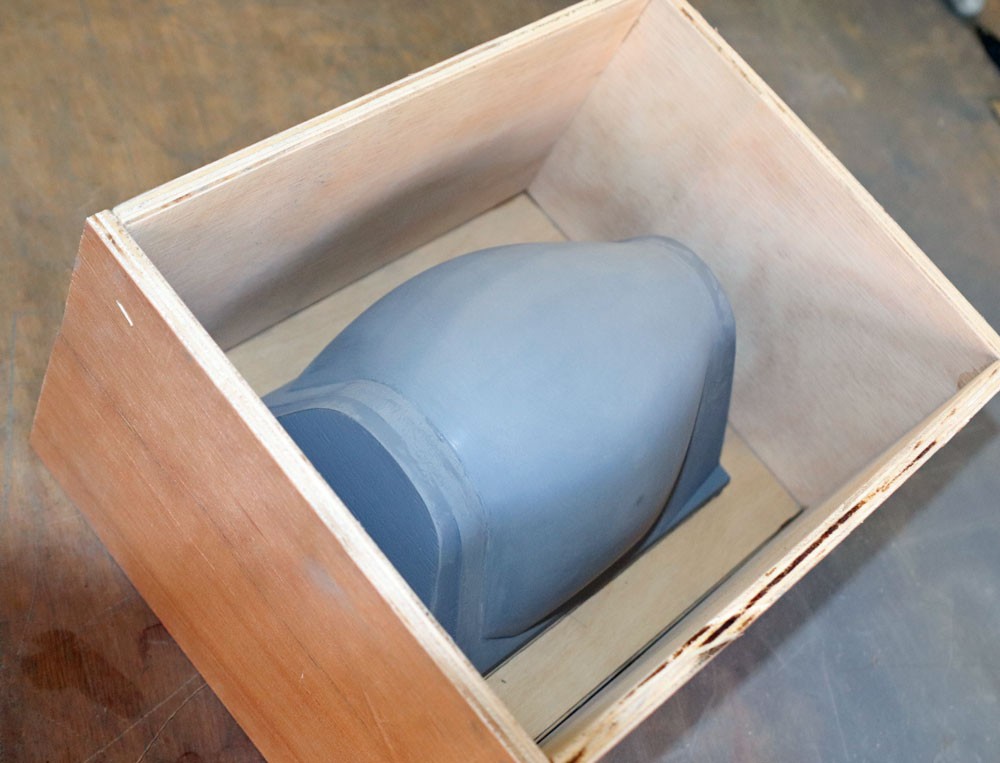
I used Alchemie RTV 133 to make my rubber mould, pouring the catalysed mixture slowly and evenly into an improvised plywood container – the pattern being fastened to its base by a pair of wood screws. As a precaution against surface air bubbles I painted some of the freshly-mixed rubber over the entire surface of the pattern before carefully pouring the rest – the slower the better to prevent air bubbles.
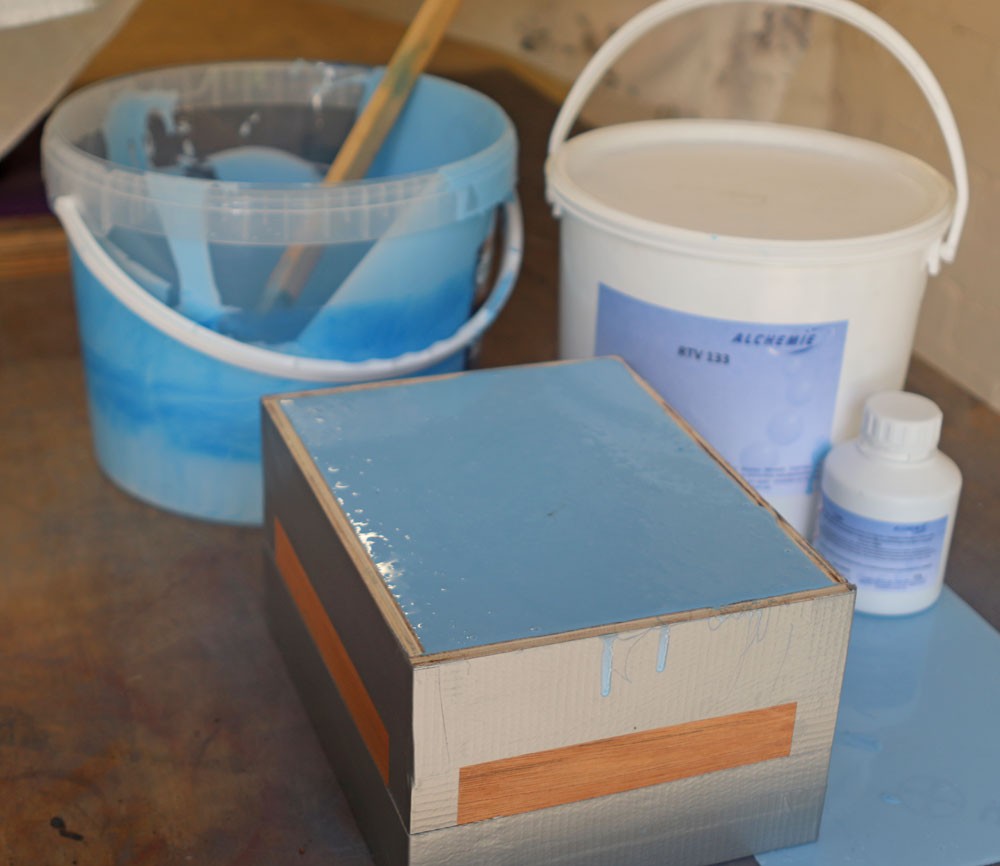
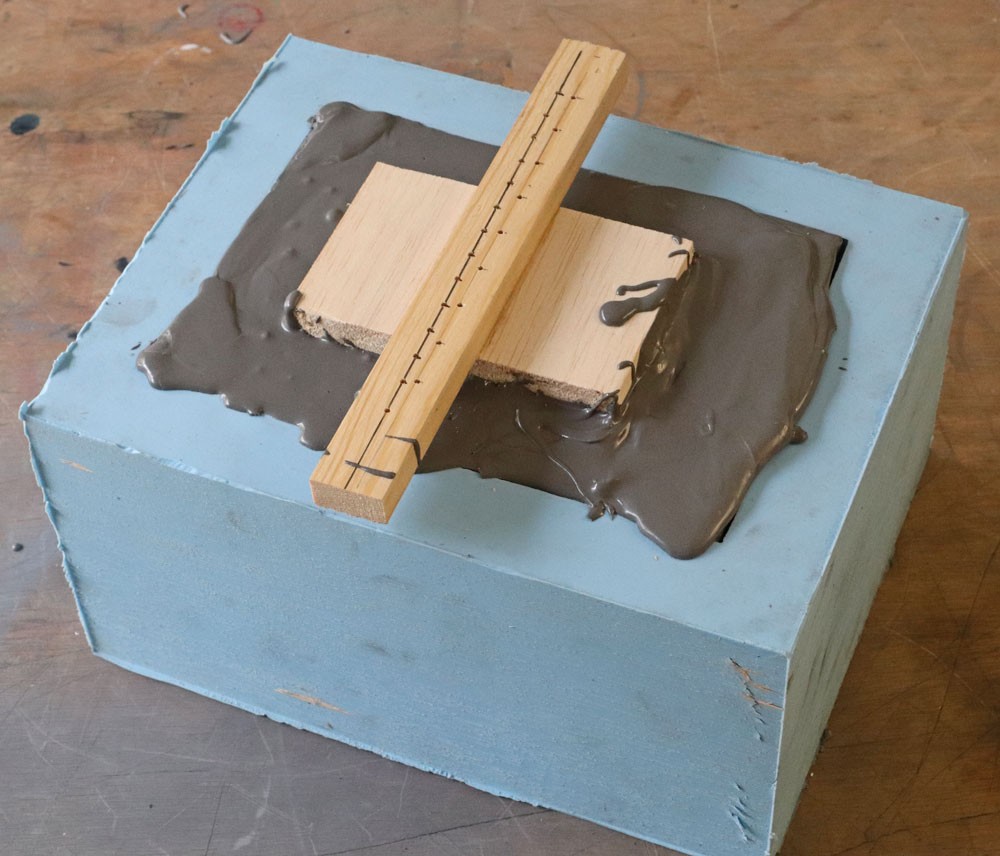
For the tool itself I used Alchemie PU 376 two-part, pre-filled resin – a low viscosity compound that degasses relatively easily. It also has a surprisingly short pot life, which very nearly caught me out. Note also from my photos that I incorporated a rectangular balsa core within the body of the casting, for the simple reason that I feared I might have insufficient resin, a precaution that proved well founded – I just had enough out of two 1Kg packs of the stuff!
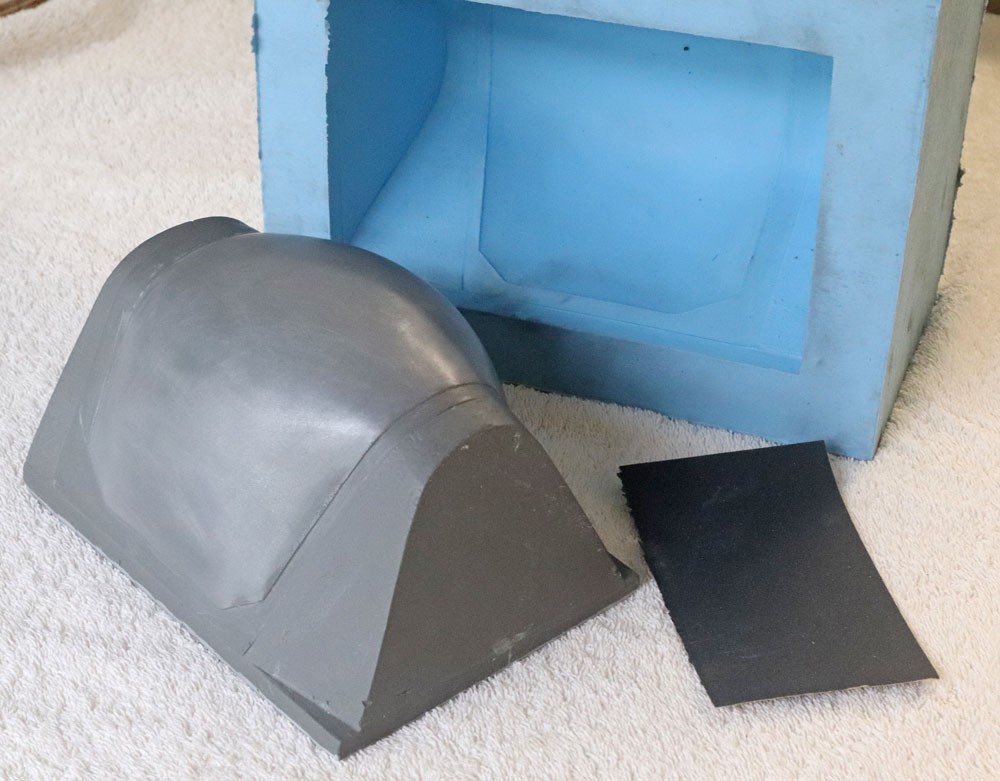
The final task on removal of the piece from the mould was to ‘grind’ its underside flat using the coarsest available grade of abrasive paper, and to dress the upper surface of the tool with 600 grit wet and dry paper.
Finally, a caveat: As is not unusual with resin casting, I encountered minor shrinkage on curing: I estimate between 1 - 2mm over a length of the canopy – minor but not insignificant!