Radiator fairings
Sunday, 22nd June, 2014
By the third week in May I had completed most of the woodwork on the model, except to fine-tune the sanding of the wings and fuselage and plug a brace of yawning gaps occupied by a trestle support near the stern. So for completeness it seemed appropriate to tackle the one remaining major external feature – the twin radiator fairings.
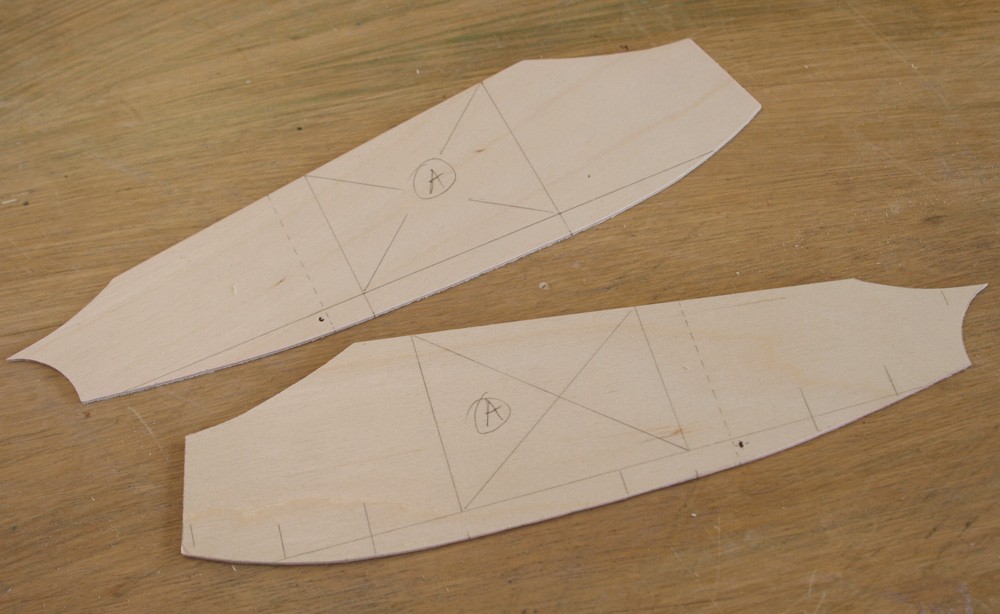
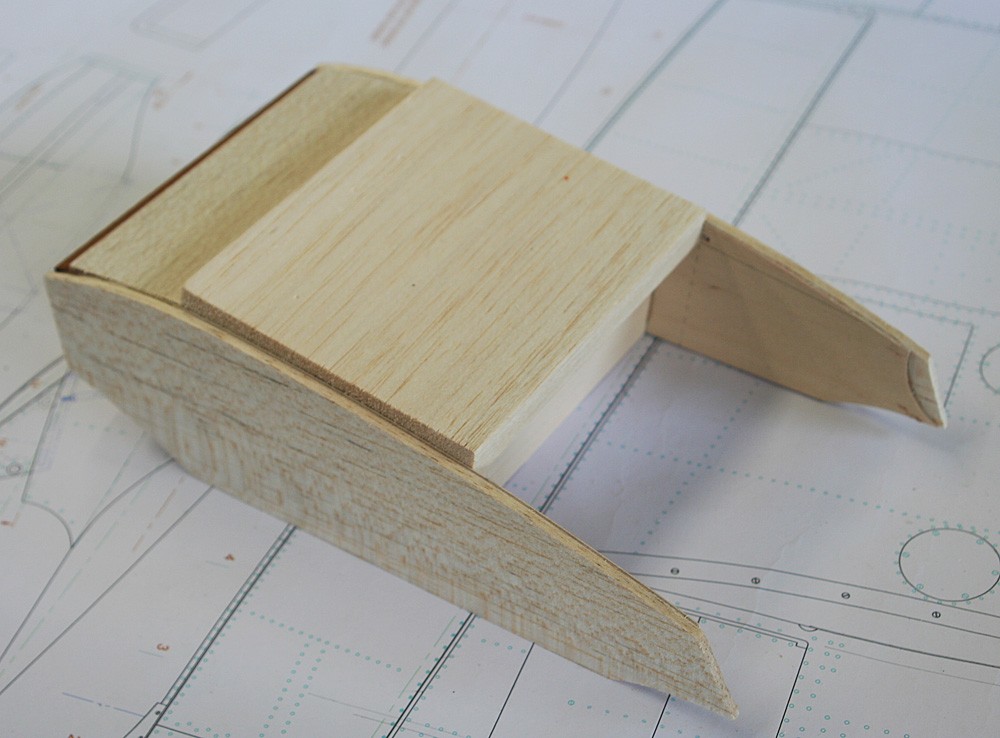
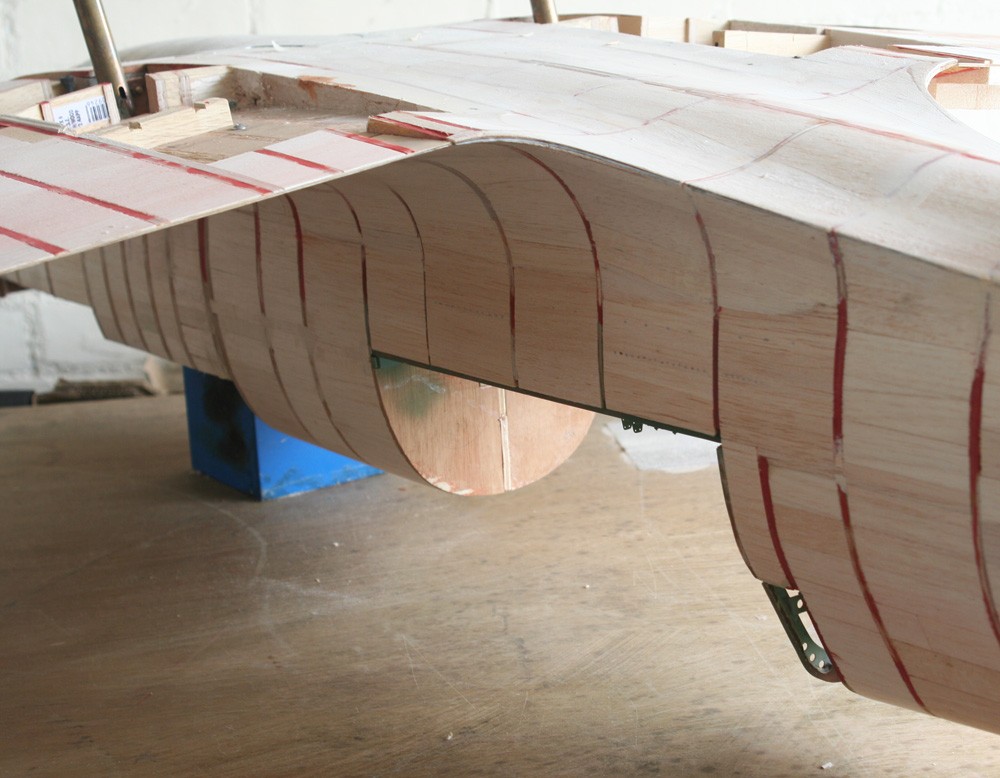
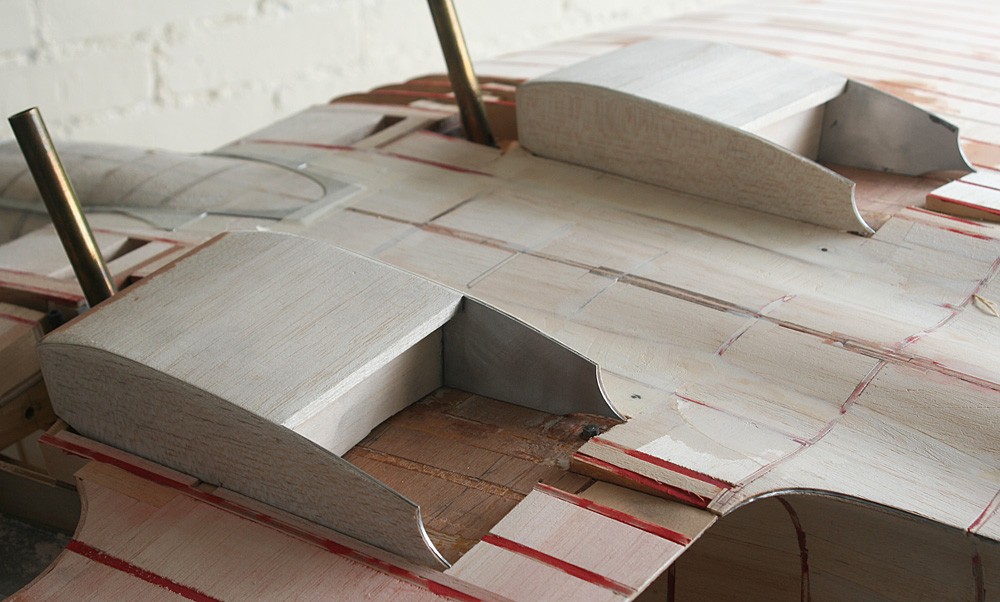
This is a task that nicely illustrates one of the first principles of scratch building: when faced with a challenging three-dimensional shape, always try to devolve it into its most fundamental form. The radiator housing of the Mk IX Spitfire has all sorts of curves going on, both externally and internally, yet essentially it is a rectangular box containing another rectangular box.
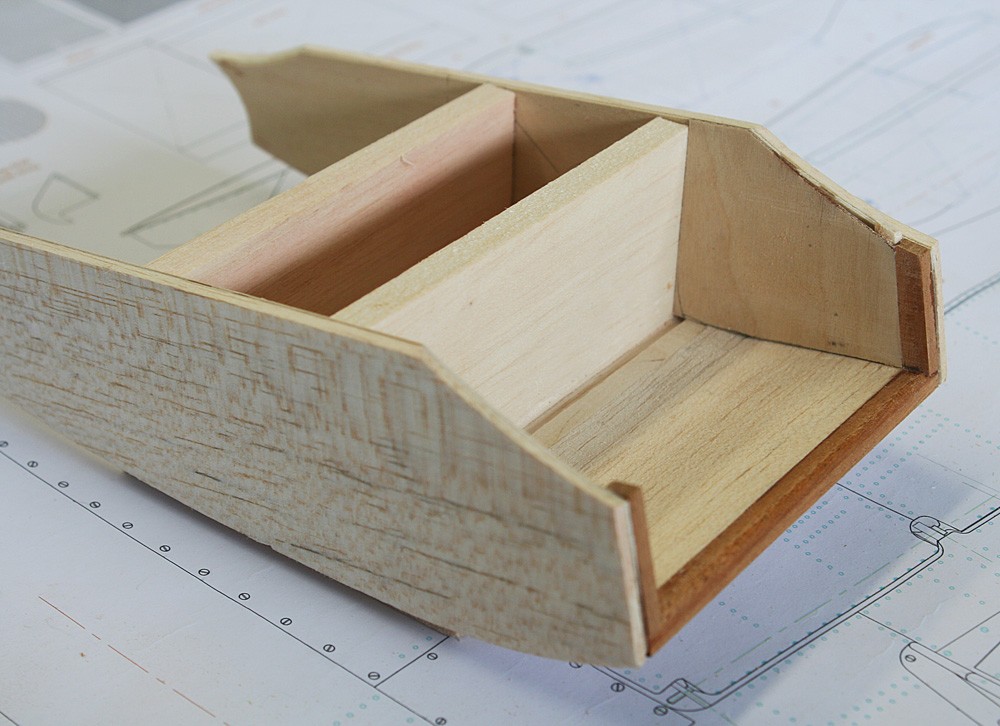
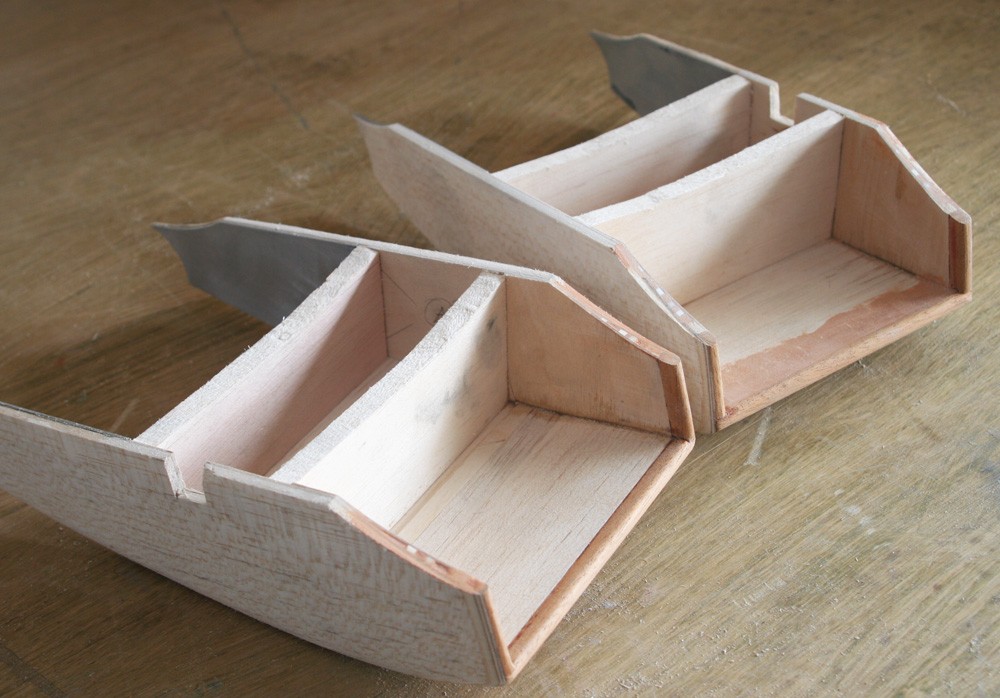
Thus the starting point is an H-shape comprising of two identical flat side pieces (laminates of thin ply and balsa sheet), joined at right angles by two sturdy rectangular balsawood panels representing the front and back faces of the radiator-oil cooler assembly. The underside, from air intake to the flap, is then built up with more balsa, which leaves the basic structure almost complete. The trick, of course, is to use wood of sufficient thickness from which to carve and sand the required lateral and ventral contours. Internally, the flanks of the fairing aft of the radiator block are parallel and represented by the two ply profiles; but forward of it the gentle inward curvature is built up with a combination of packing pieces overlain with a 0.5mm flexible ply skin. The pictures illustrate all these stages, and the use of mahogany square section to create the intake leading edges, where a harder wood will be advantageous at the metal skinning stage.
Apart from two holes drilled to locate the radiator door hinge, I have ignored all built up detail at this stage, including the doors themselves and the graceful bell-like flanges that attach to the wings. These will be incorporated later. My intention currently is to complete only the basic wooden carcasses and to install them under the wings to the extent that I can be assured of fit and alignment, etc.
I should mention that the two fairings are not left or right handed, which makes life easier; less convenient is the fact that they sit at a 1.5 degree cant to the wing dihedral angle, which must be checked for. Fitting them has required excavation of a considerable amount of material from the built-up undersides of both wings so as to create space within for the ducting and bulky radiator assemblies, which in the real aircraft extend almost to the top skin. Here, however, I have compromised by stopping mid-way at the 4mm plywood web over which each wing is built. This means that each of my radiator assemblies and the ducting that house them will be overly shallow. Yes, with a mirror and a good torch, the truncation will be visible in the finished model, should anyone care to seek it out. With a little more forethought, I could have made provision for full-depth radiators and ducting at the outset when I cut the plywood wing web and its half-sections. The fact that I omitted to do so shows poor planning and failure to always practise what I preach!