Machining the wheels
Tuesday, 1st November, 2011
The Mustang’s wheels have been problematical. For most of this year I scoured all known avenues for manufacturer’s drawings, but to no avail. My entreaties went either unanswered or met with polite but unhelpful replies. My letter to the Smithsonian archive, which I thought might get results, landed right in the middle of their move to a new location, with inevitable results. E-mails to the curator of a museum far closer to home failed even the courtesy of a reply. In desperation I tried commercial suppliers of scale flying model accessories, but the few 1/5th scale offerings that looked even remotely promising turned out to be expensive and wrong. So at the end there was only one thing left: to make my own drawings by measuring the real thing, and my sincere thanks go to the Fighter Collection at Duxford for allowing me access to their P51-D. Even then I hit problems because the mains turned out to be ‘borrowed’ from a P40. However, I got the basic dimensions needed, which meant I could scale off the detail from photographs.
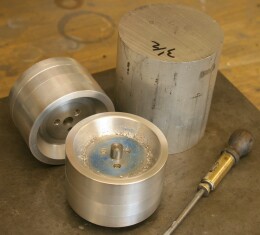
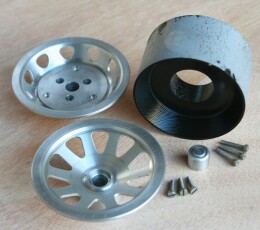
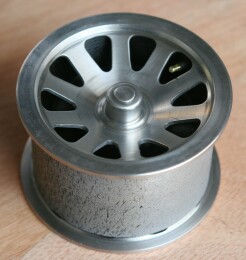
I turned all three wheels from the solid, and for the two mains that called for 3.5in. dia. machine grade aluminium bar – a big lump of metal. I estimate material wastage to be around 80 per cent if not more, enough to generate a small mountain of swarf by the time I finished. I ‘engineered’ the tail wheel in two halves; but the mains are turned out of three separate pieces, front face, rear face and a centre section, held together by 6BA screws in tapped holes. The accompanying images illustrate my home-grown ruse to render the machining process practical and to enable me to fit solid rubber tyres in due course.
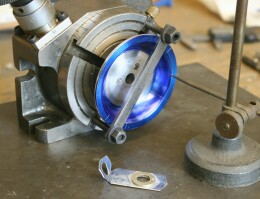
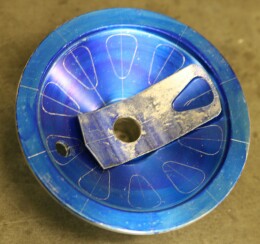
The challenge once my blanks came off the lathe was to cut the spokes, which differ front and back. It was obvious that if I failed to get the apertures identical and accurately pitched, then the job would be a disaster. Fortunately I have a dividing head to cope with the latter and I was able to devise a crude but effective jig to aid marking out (see image). Then it was down to drilling starter holes followed by a lot of painstaking filing by hand.
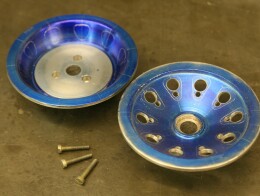
The final detail, including relatively straightforward removable hub covers and air valves, came as welcome relief. I had made the break drum assemblies some years previously when I fabricated the legs, so all I had to do before trial fitting the wheels was to turn two disks of hard PVC to act as pads to buffer and give the correct separation between wheel and brake assembly. Finally, I turned shoulders on both mild steel main axle stubs and threaded their ends for a wheel nut each, and likewise for the tail wheel.
All three aluminium hub covers are turned on the lathe as push fits, but for the main wheel ones I still need to source the small springs, which in the real thing hold them in place.
So after seven years, my P51 stands proudly on its own wheels, albeit still bereft of tyres, and a set of chocks!

Previous post

Some external stencils
Next post

Retrospective: Auxiliary fuel tank

