Wing root fairings
Friday, 22nd April, 2011
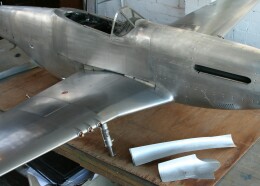
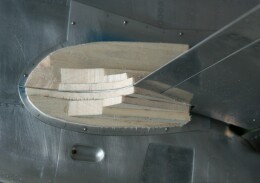
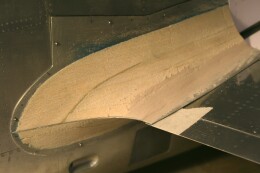
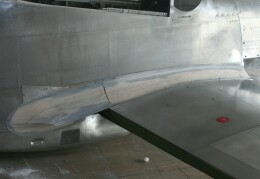
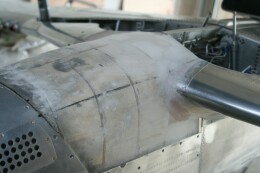
I turned to the wing root fairings during the second half of March. These comprise of four separate pieces per side. In the real aircraft they are alloy pressings, the most complex being at the trailing edge, which is where I started. The pictures speak for themselves of my method. I cut 0.5 mm alloy sheet to achieve the profiles (taken off the NAA drawings) in two planes, screwed these respectively to the wing and fuselage to obtain the underlying contour, built up the space between with scraps of soft balsa wood and, with the piece still in-situ on the model, carved and sanded the concave fillet shape. I used cyanoacrylate glues throughout, and the resulting structure is surprisingly strong and rigid.
The outer skinning was done with 0.011 in. annealed litho plate, secured with a mix of contact adhesive and Superglue, again with the piece fixed temporarily in place to provide sufficient rigidity on which to work the metal. Once fixed in place, excess top-skin can be trimmed back to the underlying profiles quite easily.
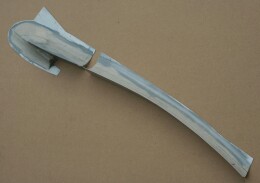
Overall, this was a fairly simple operation, although the leading edge fairings proved trickier due to their tight counter curvature, which forced me to make each of these in two pieces and adopt a weld line that does not exist on the real thing. Even with this subterfuge, repeated annealing operations and considerable burnishing were required to coax the metal into shape.
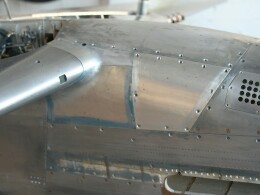
Due to the method of construction, my leading edge fairings are permanent fixtures on the airframe, secured there by strong contact adhesive, but the rest are removable. Indeed, the trailing edge fairing must be removed to install the flap. To imitate the many fasteners I used 12BA brass screws in little collars punched from pewter sheet. To get a realistic effect, I discovered that each hole in the airframe needed to be countersunk, which meant that the screws when driven home caused cupping of the pewter. However, once bedded down using soft plastic tube and cleaned up with the finest grade steel wool, these past muster reasonably well. The screws self tap into the soft aluminium skin and balsa substrate below, and the fairings once affixed, must ad considerable strength the wing-fuselage union.

Previous post

Wings and fuselage united
Next post

A pause to look back

