Hamilton Standard airscrew
Monday, 7th May, 2012
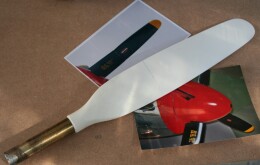
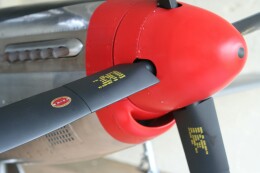
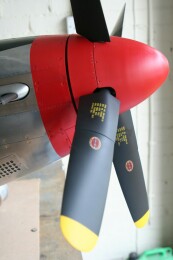
The Hamilton Standard airscrew as fitted to the P-51D is uncompromisingly businesslike, a great paddle-bladed affair that speaks more of brute power than elegance, especially when cuffed, as many were. Like the pilot’s seat, this was one of the final major tasks as my model drew near to completion during the Spring of 2012. Again, like the seat, I had no working drawings, despite having gone to considerable lengths to locate them. Yes, I did find the source of the archived material eventually, only to be told politely to go and “have a nice day”!
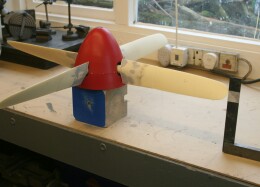
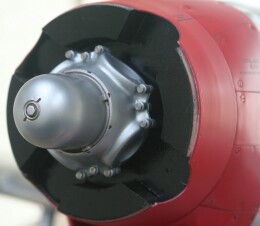
So I decided to compromise. My Internet research had revealed several commercial providers of accessories for giant scale r/c aircraft models, and one of them, Aerotech Models in the USA, lists various static-scale resin-cast propellers on their website, including a cuffed Hamilton Standard described as 1/5th scale. Frustratingly, however, it proved too small to match the 11ft 2in diameter prop of the original. However, Aerotech also lists an un-cuffed version, as fitted to the P-47, which scales almost exactly. I spent some time studying the blade profiles, and although I suspected they were not identical, they looked close enough to adapt, so long as I could graft on the cuff. As an added bonus, Aerotech has rubdowns for the stencils and Hamilton Standard logos, and my thanks go to Gary Braaten for his patient assistance over an extremely poor quality telephone link to the US.
Financially, this was no cheap fix, especially when carriage from the US is included, but I reasoned that it would offer me a starting point in the absence of suitable drawings. I have to say now that the resin castings I received, including a beautiful boss, were of high standard and quite worth the money. However, I have studied the Hamilton Standard first-hand on several extant aircraft in the UK, and taken many dozens of photographs, and my only significant criticism of the version I received from AeroTech is that the blade is too thick and its back overly convex.
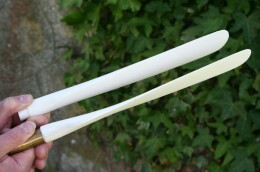
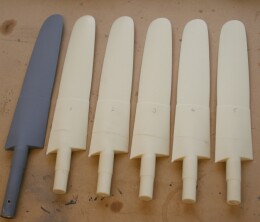
So my first job was to select one of the four blades as my pattern, and to spend an hour or so ‘whittling’ at it with abrasive paper until it passed (a) the touch test and (b) looked right from all angles as compared to my numerous photographs.
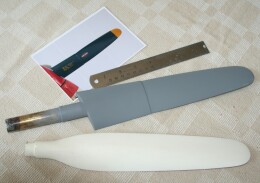
Now the cuff! I took the plunge in the only way I knew. I wrapped the blade with styrene sheet, firstly on one side with a styrene blank trimmed roughly to shape and then, when this was glued and dry, the other, finally cleaning the whole lot up and filling the basal cavities with epoxy resin. The trickiest part of the entire operation was capturing the slight angles formed by the leading and trailing edges of the cuff and the blade and ensuring the base of the cuff conformed to the spinner line. But all in all, little more than a day’s work was needed to create my pattern.
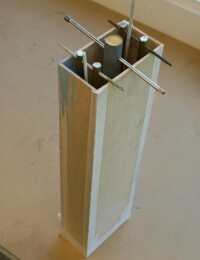
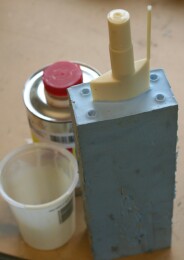
I managed to cast the sleek de Havilland blades for my Spitfire using a one-piece mould, but the savage undercut imparted by the Hamilton Standard cuff made this entirely impossible, so I embarked on my first attempt with a two-piece mould. I made a balsawood case and suspended the master into it, along with four sturdy brass rods, each having a conical shape turned into their down-pointing ends. These would create locating pins for the top half of the mould to register into the lower half. I also glued two lengths of 1/8th in. styrene rod to the upturned undersides of the cuff near to the leading and trailing edges, since I reasoned that unless I provided a means for air to escape from beneath the undercut, I would inevitably run into serious problems. I poured silicone rubber up to and just above the level of my locator cones and left to cure overnight, then after removing the brass and applying a coat of release agent, poured to top half. Here a minor crisis, because having got the rubber mix slightly wrong, it took 48 hours to cure!
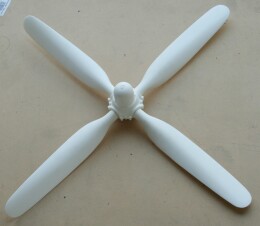
My first resin pouring went wrong due to the two halves of the mould being slightly out of line. I removed the second pouring with my heart in my mouth, but it was near perfect. And so was the, third, fourth and fifth – not a trace of an air bubble and a fine seam line transversely across the cuff that needed little cleaning up. My decision to mould the blade vertically rather than horizontally had been vindicated.
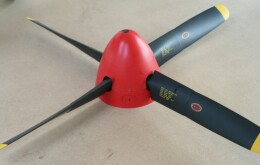
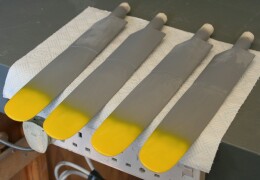
I began the finishing by applying successive coats of automotive primer, rubbing each down with fine-grade wet and dry paper. Then I sprayed Humbrol black, toned down a little to a very dark black-grey, and after 24 hours followed with a gloss coat in preparation for applying the rubdowns. These went on beautifully, and I sprayed over with a couple of semi-gloss coat and applied the final patina with T-Cut. Job done… Well not quite. Those who know will spot that the decaling on the cuffs is incorrect for a P51D. It is, of course, for the P-47. I plan to change it in due course, but for now my model sports a propeller and looks all the better for it!
Previous post

The pilot's seat
Next post

VHF and battery packs

