Retrospective: Switch panel detail
Saturday, 7th December, 2013
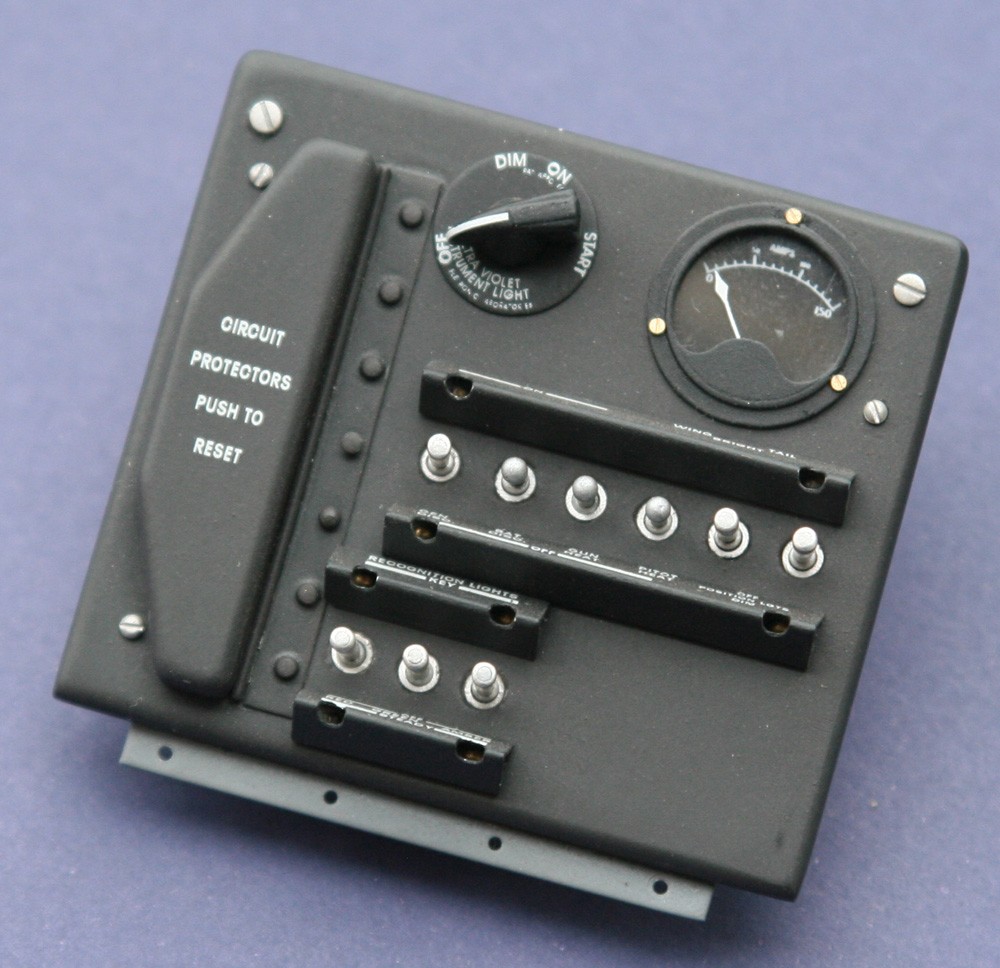
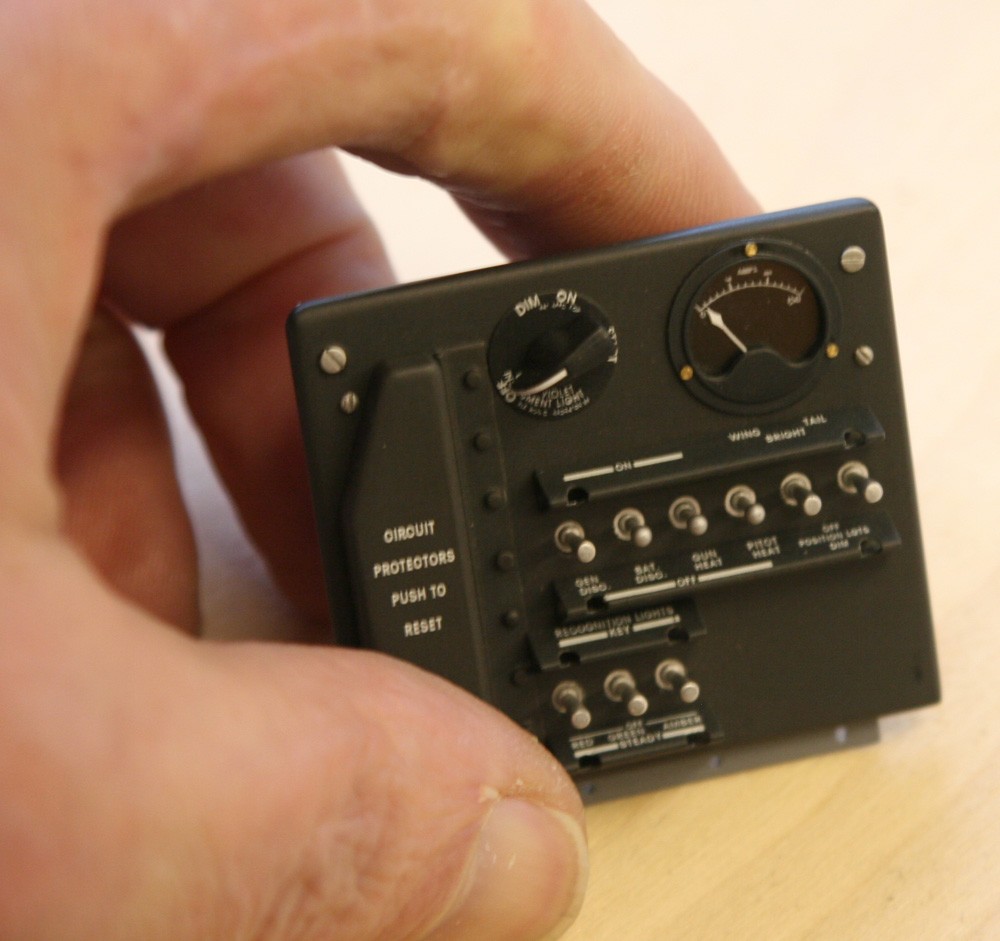
Staying within the cockpit, I focus in this and in my next blog on the several switch panels that adorn the Mustang’s cockpit, starting with the one which, from a model making perspective, I found the most interesting to make. In the P-51D Parts Manual it is called blandly the ‘right switch panel assembly’.
On it are mounted two rows of down-off switches, an amp-meter, what’s called a circuit breaker reset box and a left-right rotating switch of the kind so characteristic of aircraft cockpits.
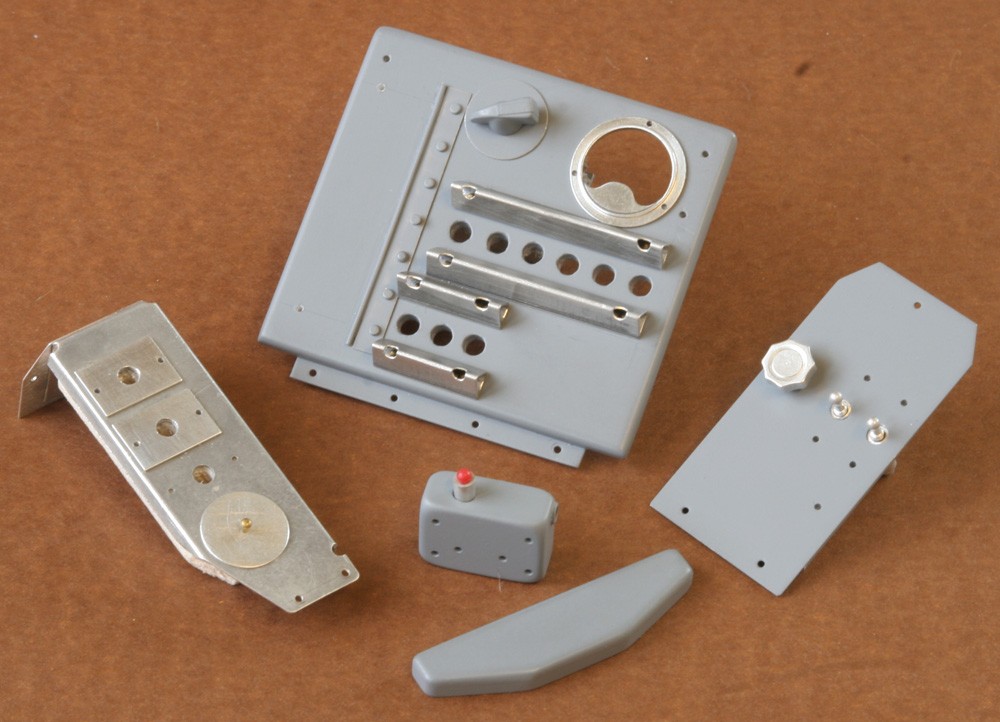
My panel is no more than a small square sheet of 2.5mm styrene rounded off all four sides. I describe a more elaborate way of making these panels from printer’s plate in the next blog, but for this particular task the easy approach was adequate. I marked and drilled eleven holes by way of the switch positions and cut the much larger aperture for the amp-meter. Now for the detail:
I stayed with styrene while making the circuit protector box. It has six sides, which I marked and filed using machine vice jaws as a guide. I cut the hinge strip for the long edge from litho plate and drilled its seven tiny rivet holes. Rather less straightforward were the out-jutting wedge-shaped identification plates that sandwich both rows of switches. I managed to fold some litho plate to the appropriate acute angle, but was forced to graft in styrene strip for the basal side of the triangular section. All these items had to be detachable, such that they could be dry fitted and removed for final assembly only after painting and addition of the extensive graphics.
I lathe-turned the bezel for the amp-meter from aluminium round, not difficult, but requiring very careful parting off. Trickier was the cutting of its tiny basal lobe from printer’s plate. This took several attempts and some very careful applications of cyanoacrylate glue to hold it securely and invisibly inside the bezel. My techniques for making aircraft instrument faces and their needles were outlined in an earlier blog, so I will not repeat then here.
Thus at this stage all that remained were the switches.
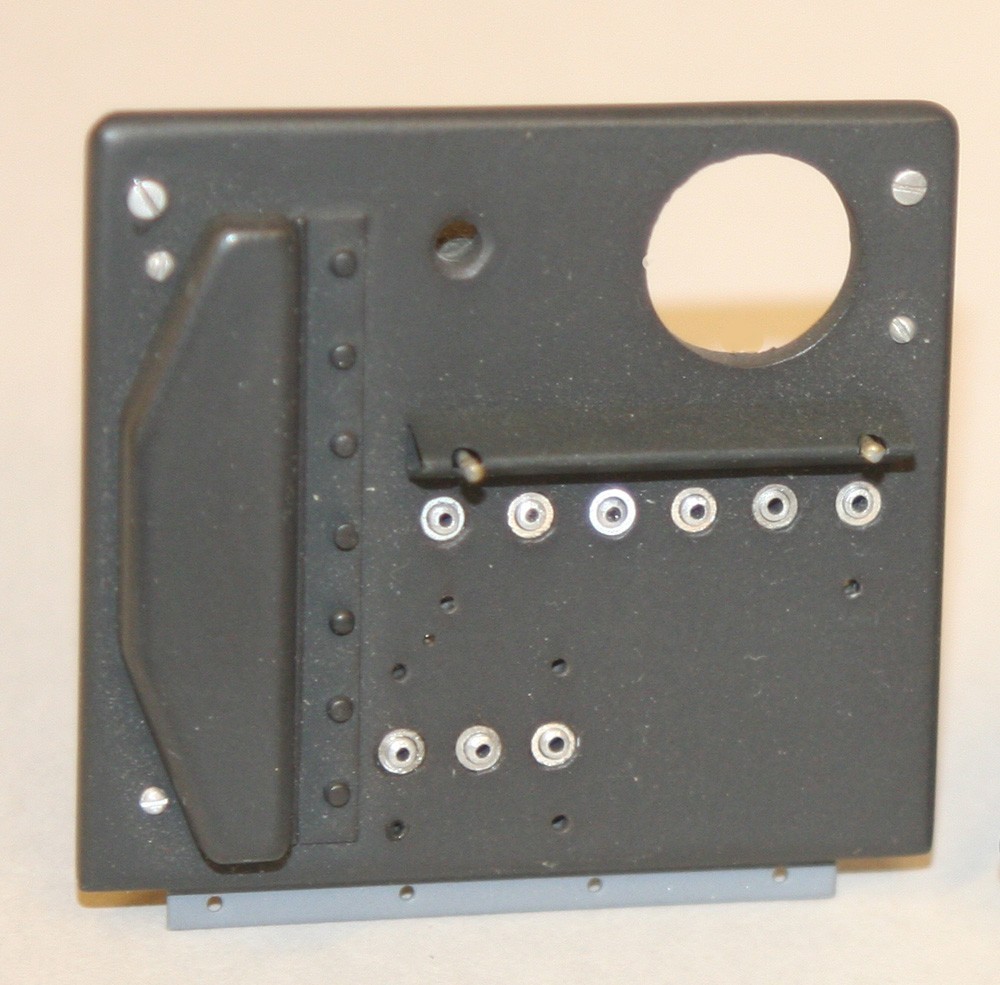
First the up-down variety: It was clear from my references that these appear in two kinds on the same panel, a dumbbell form and a shallow tapered form. This may be due to retrofit, but I decided to stay with it for added interest. By telescoping a supporting length of brass round into some small-diameter alloy tube, I was able to turn and part tiny scale tapers each one of which could then each be threaded onto a long-shank 1/32 in. alloy rivet. The dumbbell switches were another matter. It was obvious that my lathe would be impractical, so I reverted to a technique from my plastic modelling days and involving more 1/32 in. alloy rivets. Taking each one in turn, I dipped the head-end into liquid ‘Crystal Clear’. This is a milky fluid that becomes transparent on drying hard (so it is frequently used for glazed windows in very small-scale models). What matters here is that it is viscous enough to assume and retain a spherical shape over the rivet head, which can be enlarged through successive dipping cycles. I think it took about three goes to get the sought after size, but attrition was high and only possible to determine after spray painting with Alclad. Nevertheless, by using this somewhat ad hoc method, I managed to produce a full set of switches to within acceptable limits. Each one has a little collar, and these too required turning and drilling on the lathe, but with this done the way to assembly was open. First the collars into their holes in the pre-painted panel, then each switch in turn through their collars and both secured with a dab of cyanoacrylate glue applied from the rear.
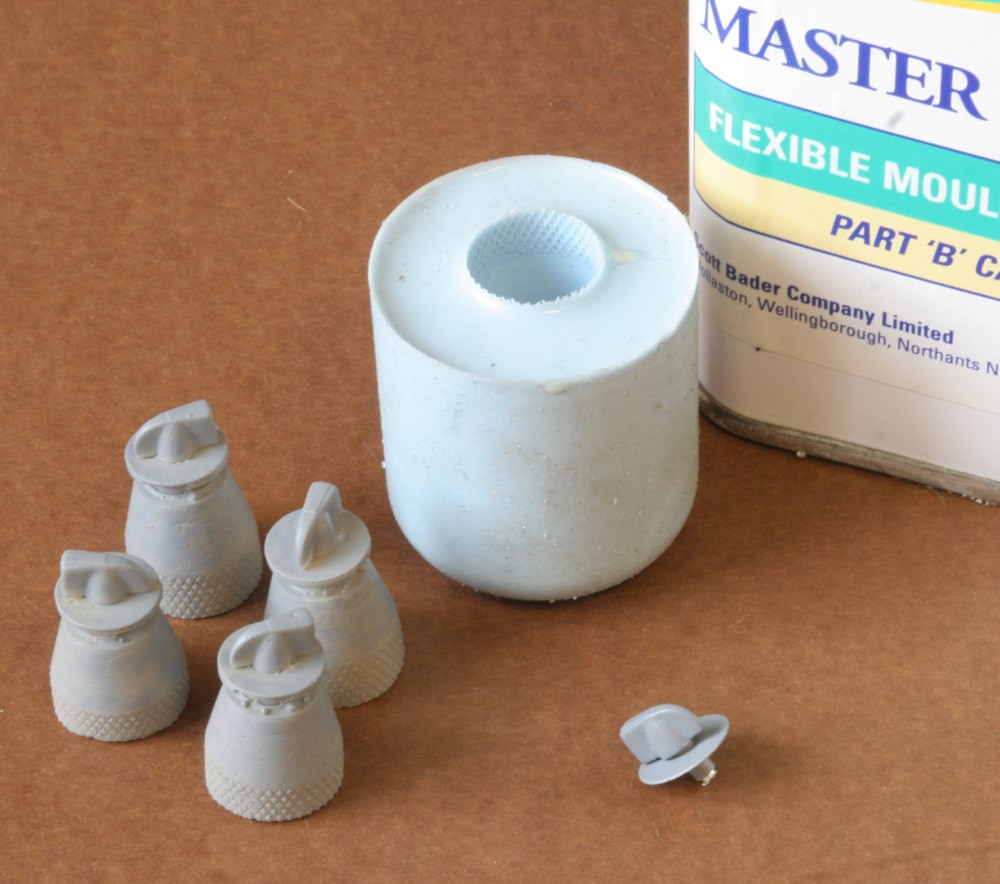
Now for the rotating switch: While only one such item was required for this particular assembly, more would be needed throughout the entire cockpit – and all had to be identical. It took little imagination to conclude that the only way forward was to create a master pattern from which to cast resin clones. In the event, it took only two attempts to fashion an acceptable pattern in styrene, essentially a slotted boss turned in the lathe, into which was set a wedge shaped crosspiece, the latter carved with a sharp scalpel to its finished shape after grafting together. I stress, this really is the easiest option. The casting operation itself needs little explanation, except to stress the caveat: ‘make more than you need’.
Perhaps surprisingly, the most difficult and frustrating stage of the entire switch making operation was applying the little white lines down the narrow leading edge of each of the left-right switches. It would have been impossible to use dry transfers here, so I adapted stock water slide transfers in the form of straight white ruled lines. It was one of those incredibly fiddly jobs, where I became frustrated to the point that my hands would tremble, immediately rendering success ever more elusive. But I got there in the end!
Previous post

Retrospective: Handles and levers
Next post

Retrospective: More switch panels

